

What this page is
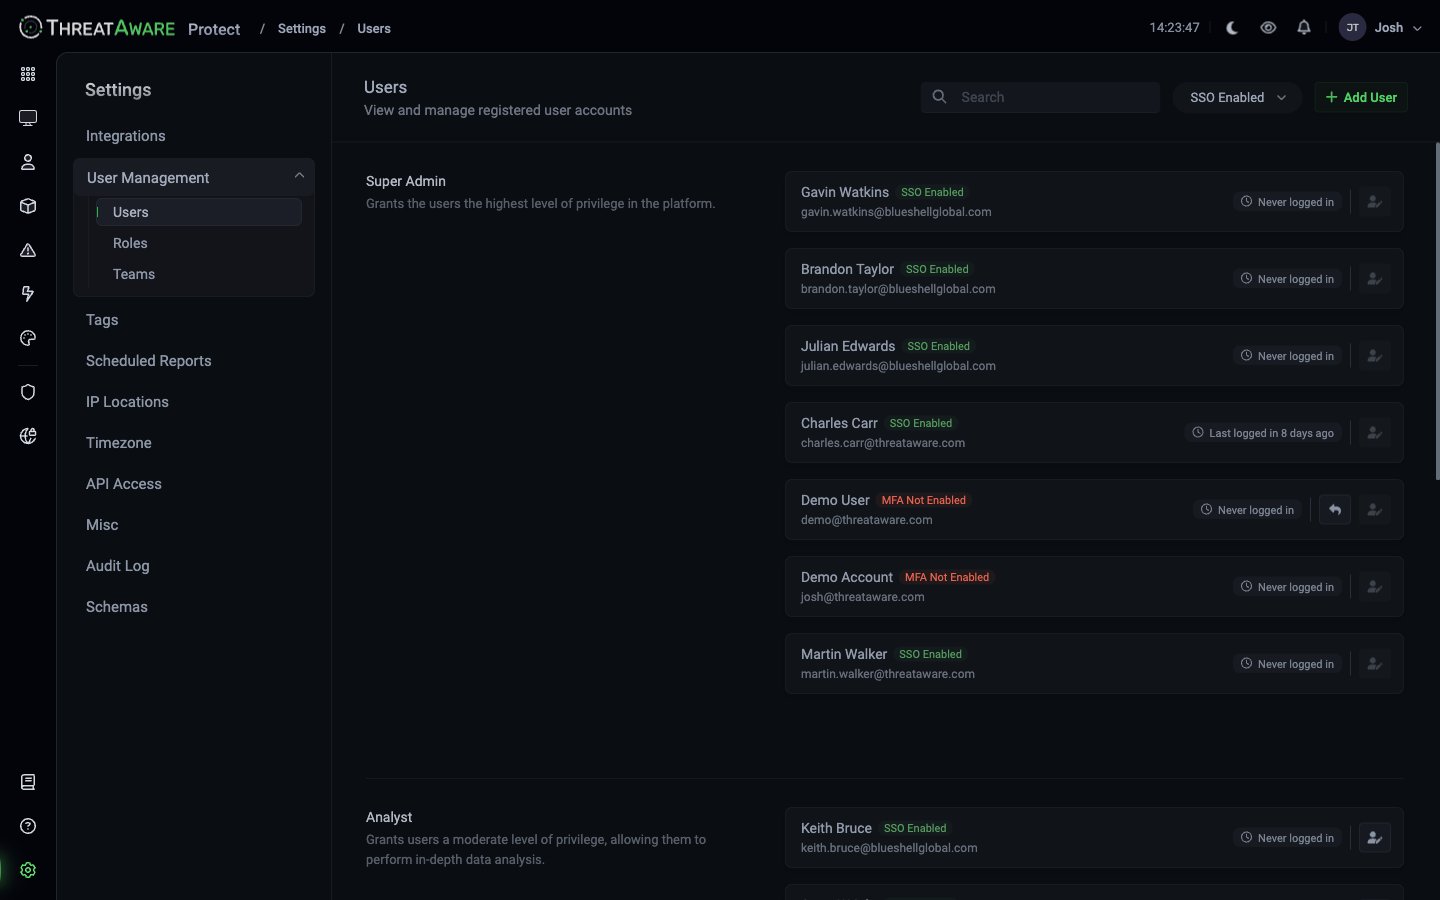
Settings → User Management → Users at/settings/users lists every platform user — people who log into Protect itself. Not to be confused with User Inventory, which is the end-user list pulled from your identity providers.
Layout
Users are grouped by their assigned role, with each role section showing:- Role name + role description
- Per-user cards: avatar, name, email, SSO/MFA state, last login, edit icon
- Search — filter the list
- SSO Enabled ▾ — filter dropdown
- + Add User — invite a new user
Per-user state badges
Adding a user
1
Click + Add User
Top-right of the page.
2
Provide details
- Email — the user’s work email (matched against your IdP for SSO)
- Display name — first / last
- Role — one of the four defaults or a custom role
3
Enable SSO
Tick Enable Single Sign-On if the user has a matching IdP account. Protect adds them to the Entra ID / Okta application automatically.
4
(Optional) team membership
Assign to one or more Teams.
5
(Optional) data filters
Restrict the user’s data view by tag / location / device type. See Access Control.
6
Save
User receives an invitation email if SSO is off, or can sign in immediately if SSO matches.
Editing a user
Click any user card to edit:- Change role
- Change SSO state
- Update team membership
- Update data filters
- Reset MFA (forces re-enrolment on next login)
- Deactivate (suspends without deleting — preserves audit trail)
- Delete (permanent; audit trail preserved with anonymised identity)
SSO and the mail attribute
Protect matches users to your IdP on the mail property, not UPN. Symptoms of a mismatch:- User can’t sign in even though their Entra ID account exists
- “User not found” on SSO redirect
- SSO Enabled badge but Never Logged In
mail attribute in Entra ID / Okta for that user, then re-save in Protect.
Bulk operations
For larger user bases:- CSV import — bulk-invite users with role + team mappings
- Auto-provisioning — users land in Protect automatically when added to the Entra ID application (contact support to enable; users default to Limited Viewer role)
Offboarding flow
When someone leaves:1
In your IdP, disable the user
They lose access to the ThreatAware application immediately.
2
In Protect, Deactivate the user
Settings → Users → click user → Deactivate. Their tokens revoke; their role assignments stay intact for audit.
3
(Quarterly) review and delete
Use the SSO Enabled ▾ filter and the “Last logged in N days ago” badges to find dormant accounts. Confirm the user has truly left, then Delete.
Cross-references
Access Control
Conceptual overview
Settings → Roles
Define what users can do
Settings → Teams
Group users for sharing